

Creating Next.js App

Hi there, I'm a tech enthusiast with a passion for programming and a keen eye for developing high-quality software solutions. With my skills in Java, Spring Boot RESTful API development, and Android app development, I've gained a wealth of experience in building robust and scalable applications that meet the needs of businesses and end-users alike.
Recently, I've ventured into the world of Next.js, and I'm excited to expand my knowledge and skills in this area. As an enthusiastic learner and problem-solver, I thrive in challenging environments and am constantly pushing myself to grow and evolve.
When I'm not coding, you can find me exploring new technologies, tinkering with new gadgets, or playing video games. I'm also passionate about giving back to the tech community, and I regularly contribute to open-source projects and share my knowledge and experiences with others.
If you're interested in collaborating on a project or just want to connect, feel free to drop me a message!
Creating a web application using Next.js and Yarn is an excellent way to build fast and scalable web apps. Next.js is a React-based framework that offers server-side rendering (SSR), automatic code splitting, and optimized performance out-of-the-box. Yarn, on the other hand, is a package manager that provides faster installation times and more reliable dependency management than its predecessor, npm.
Introduction
In this tutorial, we'll show you how to create a new Next.js app using Yarn. We'll assume you have Node.js and Yarn already installed on your machine.
Tools and Technologies Used:
To get started with creating a Next.js app using yarn, we need to have the following tools and technologies installed on our system:
Create a new Next.js app
To create a new Next.js app using Yarn, you can run the following command in your terminal:
yarn create next-app client
This will create a new Next.js app named client in a subdirectory of your current directory. You will be asked some questions, do the following:
success Installed "create-next-app@13.2.4" with binaries:
      - create-next-app
√ Would you like to use TypeScript with this project? ... No / Yes -> Yes
√ Would you like to use ESLint with this project? ... No / Yes -> Y
√ Would you like to use `src/` directory with this project? ... No / Yes -> Yes
√ Would you like to use experimental `app/` directory with this project? ... No / Yes -> No
√ What import alias would you like configured? ... @/* -> Enter
Open the project in VS Code
When Opening the VS Code, you will see:

package.json Contents
Here's what our package.json file looks like:
{
  "name": "client",
  "version": "0.1.0",
  "private": true,
  "scripts": {
    "dev": "next dev",
    "build": "next build",
    "start": "next start",
    "lint": "next lint"
  },
  "dependencies": {
    "@types/node": "18.15.10",
    "@types/react": "18.0.30",
    "@types/react-dom": "18.0.11",
    "eslint": "8.36.0",
    "eslint-config-next": "13.2.4",
    "next": "13.2.4",
    "react": "18.2.0",
    "react-dom": "18.2.0",
    "typescript": "5.0.2"
  }
}
Running the App
To open the terminal in VS Code and execute yarn run dev, follow these steps:
Open VS Code.
Click on "View" in the top menu bar.
Hover over "Integrated Terminal" and select "New Terminal".
Alternatively, you can also use the keyboard shortcut Ctrl + Shift + ~ to open a new terminal directly.
We can start the development server using the following command:
yarn run dev
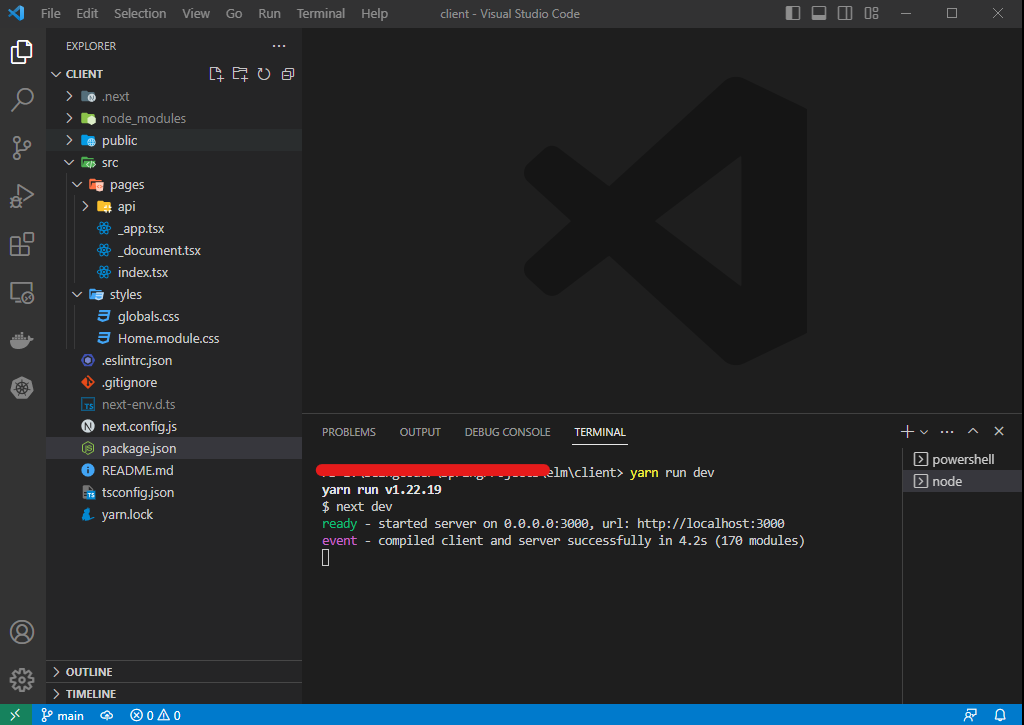
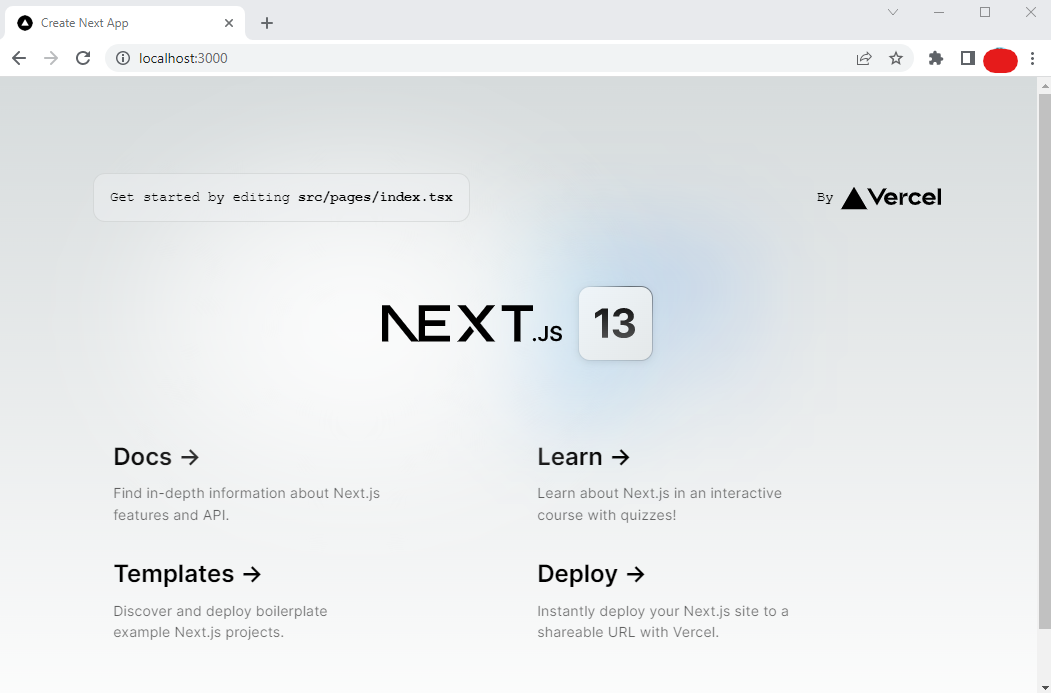
This will start the Next.js development server and provide us with a URL to open in our browser. By default, the development server runs on port 3000. Head over to http://localhost:3000, you see the App is up and running:
Conclusion
In conclusion, creating a Next.js app using Yarn is a straightforward process that requires only a few simple steps. By following the steps outlined in this blog post, you should now be able to create your own Next.js app using Yarn as your package manager.

